This blog post is a guide to install a Plex server on an Proxmox LCX Container with working hardware transcoding.
Background
Until changing to this setup, i ran my Plex Server on my Synology NAS. It was gettings slower and slower as my library grows also there is an NAS update in planning in near future, so moving the Plex Server to another hardware was the logical choice.
My setup
AceMagic Vista Mini V1
- Intel N150 Processor
- 16 GB DDR4 RAM
- 512 GB NVMe Harddrive
- Proxmox 9.x (at the time of writing: 9.1.9)
Guide
Assumptions
This guide asumes, that you already have an up and running Proxmox system.
Downloading the CT template
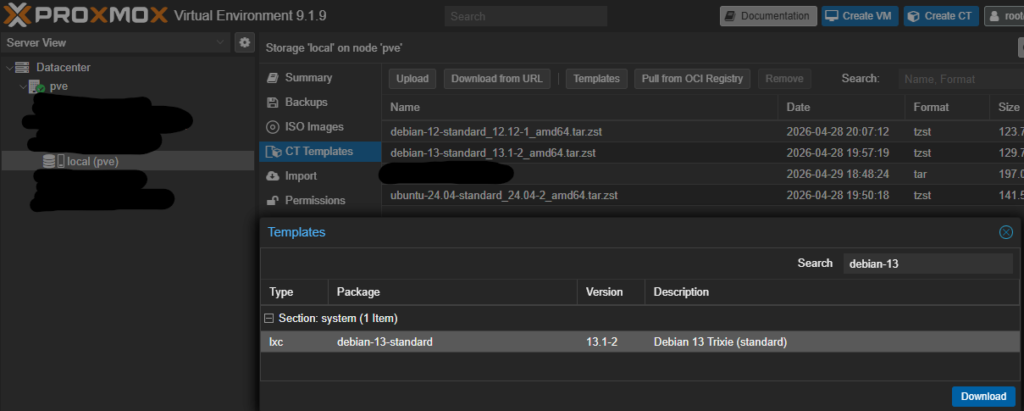
Goto your storage (local or external) and choose CT Templates. Next click on “Templates” and search for debian-13. Select the debian-13-standard template and download it to your storage.
Create the container
Click on the “Create CT” button top right of the Proxmox webinterface.
- Set a hostname and password
- Important: uncheck the “unprivilidged container” checkbox
- Choose the Debian 13 template you downloaded in the step before
- allocate at least 40 GB of disk space
- allocate as many cores as you whish (i assigned2)
- assign memory as you wish (i assigned 6144 MB)
- setup the network/DNS as needed for your infrastructure
Setup repositories and install packages
After creating the container and starting it, install the latest updates and some tools.
sduo apt update
sudo apt install curl gnupg
Open /etc/apt/sources.list and check if all required repositories exist. Add missing ones.
deb http://deb.debian.org/debian trixie main contrib non-free non-free-firmware deb http://deb.debian.org/debian trixie-updates main contrib non-free non-free-firmware deb http://security.debian.org trixie-security main contrib non-free non-free-firmware
Add Plex repository
In order to use the repository, you need to import the signing key first
curl -L https://downloads.plex.tv/plex-keys/PlexSign.v2.key | sudo gpg --yes --dearmor -o /etc/apt/keyrings/plexmediaserver.v2.gpgThen add the repository
echo "deb [signed-by=/etc/apt/keyrings/plexmediaserver.v2.gpg] https://repo.plex.tv/deb/ public main" | sudo tee /etc/apt/sources.list.d/plex.listInstall packages
Now that you have added the plex repository, you can install the plex server + all required packages for hardware transcoding. (If you use an NVidia or AMD card, you have to install the drivers for your card, not the intel ones)
sudo apt update
apt install plexmediaserver vainfo i965-va-driver intel-media-va-driver firmware-misc-nonfree nfs-common intel-gpu-tools
Add the Plex user to the render group
In order for Plex to access the GPU, the plex user needs access to the render device.
usermod -a -G render plexMap the GPU from host to container
In order to use the GPU as transcoding device, you have to map the GPU from Host into the Container.
First you need some informations about the Plex user, run the following command inside your Plex container.
sudo cat /etc/passwdNote the UID and GID for the plex user (in my case they are 999 and 996)
On the host run the following command:
ls -l /dev/dri/This should display the available Direct Rendering Infrastructure (dri) devices. Ignore the “by-path” entry and note the others.
In Proxmox Webinterface, go to your plex server container, choose resources, and add the found devices. Check the “Advanced” checkbox and enter the UID and GID for the plex user.
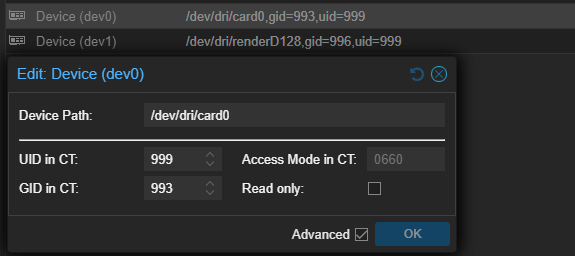
Without this mapping, the plex server will not be able to use the GPU as transcoding device
Verify setup
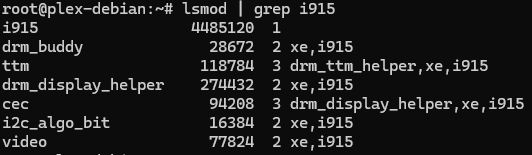
Reboot your container, then check if the GPU is visible to the system. (if you use an AMD or NVidia card, you have to search for those drivers when using the lsmod command)
vainfo
lsmod | grep i915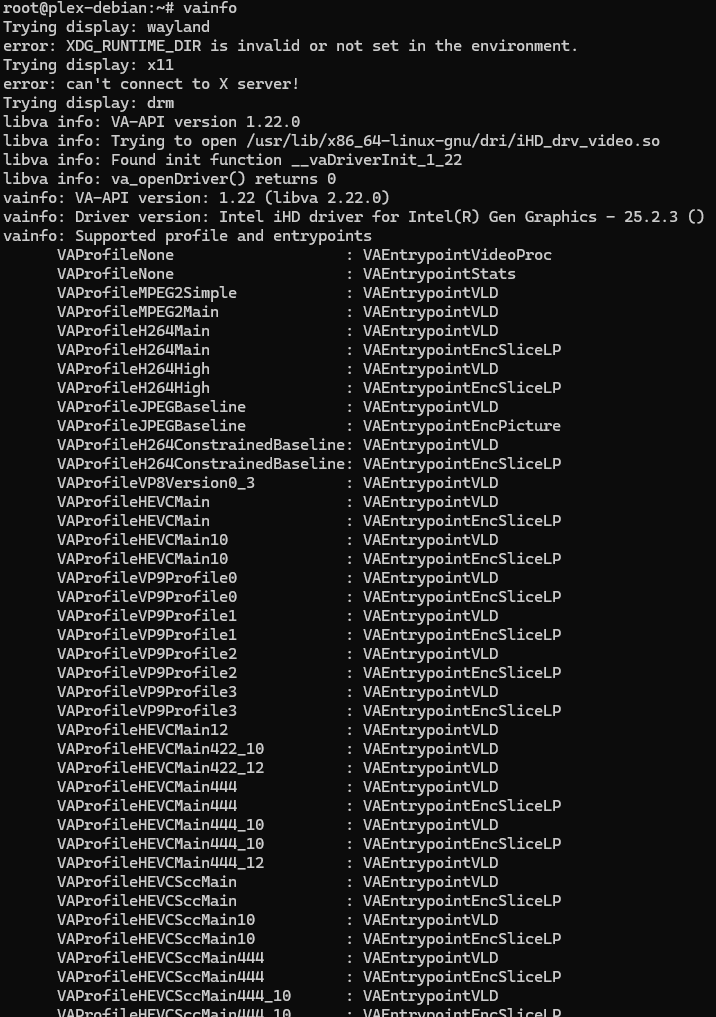
Plex Setup
I will not guide you through the plex setup here, but after the setup is completed, you should be able to select the Hardware transcoding device in the plex server settings
